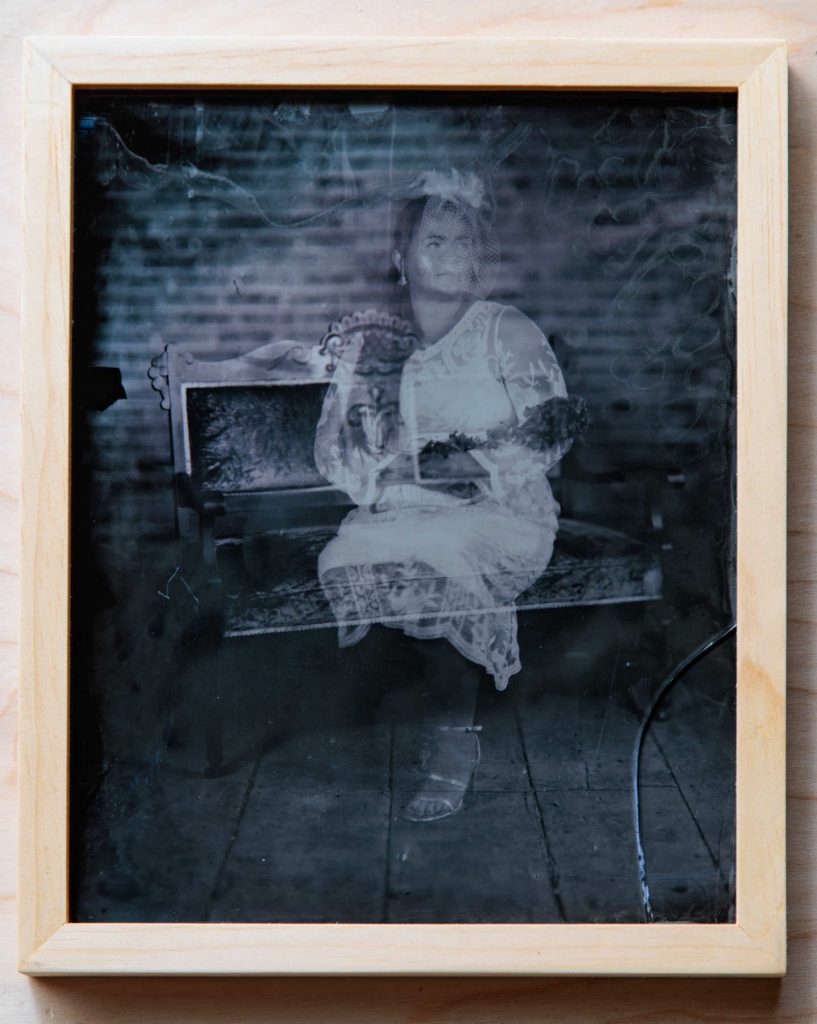
Ambrotype is one of the first commercially viable photography methods. Ambrotype is one flavor of wet plate collodion and is a wet plate photograph on glass. The name has a bit of mystery. Some believe it is based on the Greek term for “immortal impression”. Others attribute it to to James Ambrose Cutting who named it after himself in a series of patents in 1854.
Whatever the origin, Ambrotypes are photographs on glass and can take two forms – a positive image and a negative image. The positive Ambrotype is an underexposed image that is viewed directly when the glass is backed with something dark. This can be black glass or a black coating or even the glass itself is colored. A negative Ambrotype is fully exposed and developed to be used in a POP printing process to produce positive images. This is very similar to modern film where a negative is used to print a positive image.
We love Ambrotypes because of their unique beauty and depth. We cut, polish and clean all of our glass for Ambrotypes and often recycle old glass.
How to Make an Ambrotype
- Cut and clean glass
Cut a glass plate to size and sand the edges (so you don’t get cut). Then the plate has to be thoroughly cleaned.
- Albumin Coating
A mixture of egg whites and water is prepared and used to coat the plate so the collodion sticks. For smaller than 8×10 inch plates just the edges can be coated. I usually coat the entire glass surface for larger plates.
- Coat with salted collodion
The glass is coated by pouring on collodion solution, moving to coat the entire surface, and then pouring off the excess.
- Activate with Silver
Once the collodion sets (about 15 seconds), the plate is submerged in a solution of silver nitrate for 3 to 5 minutes. The silver activates and sensitizes the plate to light. The next steps require a darkroom because the plate will be light sensitive.
- Plate Holder
The plate is removed from the silver bath and drained for 10 seconds. The back is wiped to remove excess silver nitrate and then the plate is put into the plate holder. The holder keep light away from the plate and has a slide that can be opened for exposure
- Create the Image
While the plate is sensitizing I usually get the camera prefocused and ready. The plate holder is mounted on the camera, the slide opened and the shutter opened to expose the image. Then the slide is closed and the plate and holder returned to the darkroom.
- Develop with Iron
In the darkroom the glass plate is removed from the holder and an iron developer poured over the surface. The negative image will appear in 10 to 30 seconds and the development stopped by rinsing the plate with water. Development is by “eye” and the Alchemist has to guess the proper time.
- Fix
After the plate is washed it is no longer light sensitive so the next steps can be done in sunlight. The plate is placed in a solution of fixer – either sodium hypo or cyanide (yes cyanide). Within a minute or so the unreacted silver is removed leaving behind the full image!
- Wash
The plate is washed in several steps to remove the excess fixer. Then the plate dried.
- Varnish & Finish
The final step is to apply a coating of varnish to the image. This varnish protects the collodion and keeps the silver from tarnishing. We generally use traditional Sandarac varnish (a mixture of lavender oil and frankincense)but sometimes we use shellac. Both of these are traditional varnishes that should last for centuries!

Back to Vintage Photographic Processes